.png)

NOTE: If you’re a parent and a staff member please check this article on how to set up your account.
Ordo allows parents who have children going to the same school but in different campuses or locations to order meals using just one account.
Please follow the step-by-step instructions below.
Setting up your Ordo Account
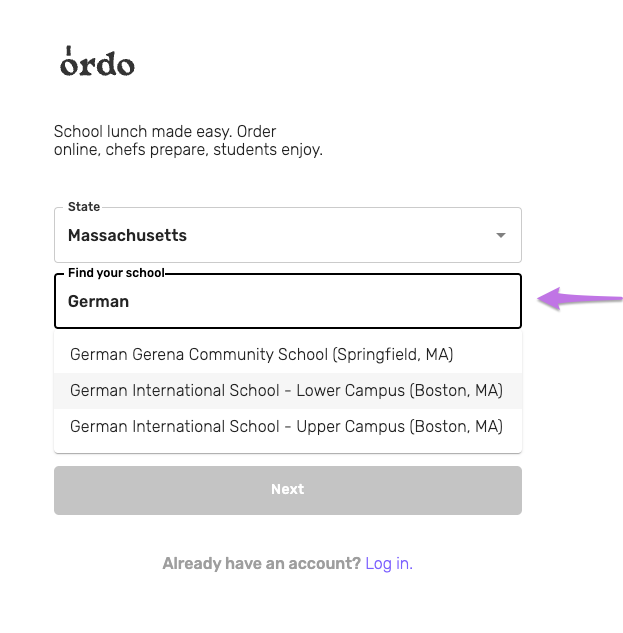
1. Go to - https://www.ordo.com/ - and click "Sign Up".

2. Choose your State and search for your school's name. You can start typing your school's name and then choose your school from the list.
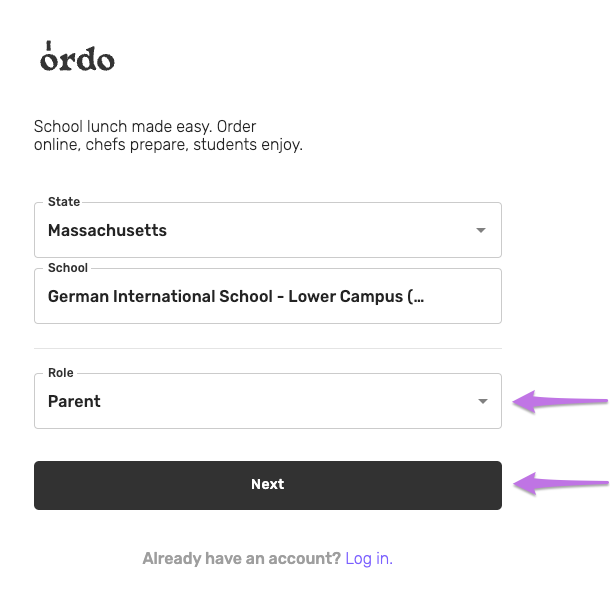
3. Select “Parent” as the Role, then click “Next”.
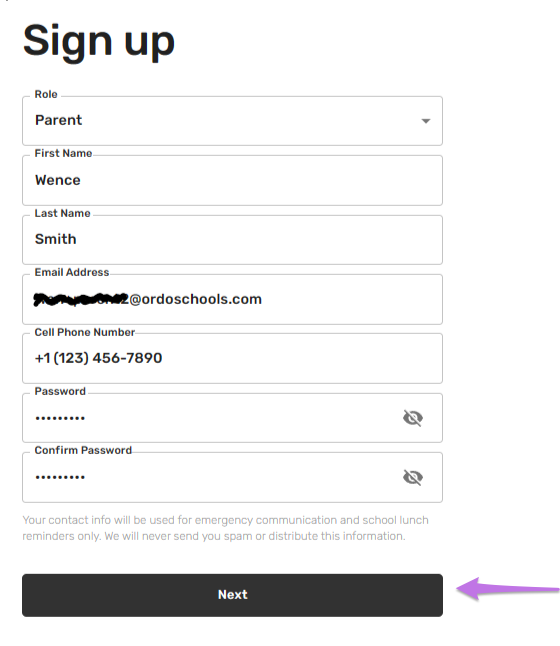
4. Fill out the Sign Up page with your details and create and confirm your password. Once done, click Next.
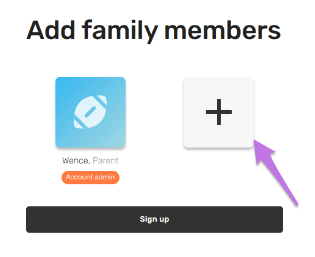
5. The next page will allow you to add the student to your Ordo account. Click the plus key.
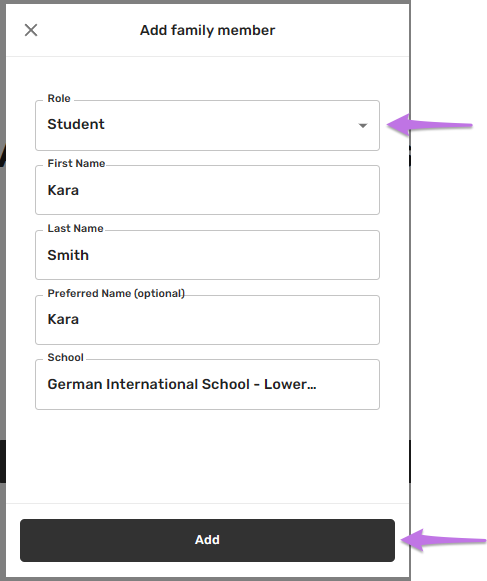
6. The “Add a family member” window will appear. The Role should be set to Student. Enter your child’s First Name and Last Name (Preferred Name is optional). The School name will be automatically populated depending on what was chosen on the previous page. Click “Add”.
8. The next page should reflect the student’s name you added to your account as a Family Member.
NOTES:
- If you don’t need to add any other family members, just click “Sign Up” to complete the process.
- If you need to add your child who goes to the same campus, click the plus key and follow the same steps. Otherwise, click the “Sign Up” button to complete the process.
- If you need to add your child who goes to a different campus, please follow the steps below (look for “Adding another student to your account from a different school/campus”).

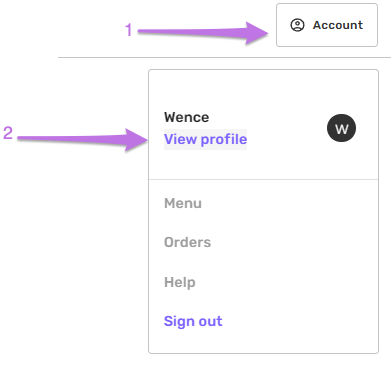
9. You will be taken to your Ordo account’s landing page. Click the “Account” button on the upper right corner of your screen and click the “View Profile” button under your account name.
Adding another student to your account from a different school/campus
1. Click the “Account” button on the upper right corner of your screen and click the “View Profile” button under your account name.
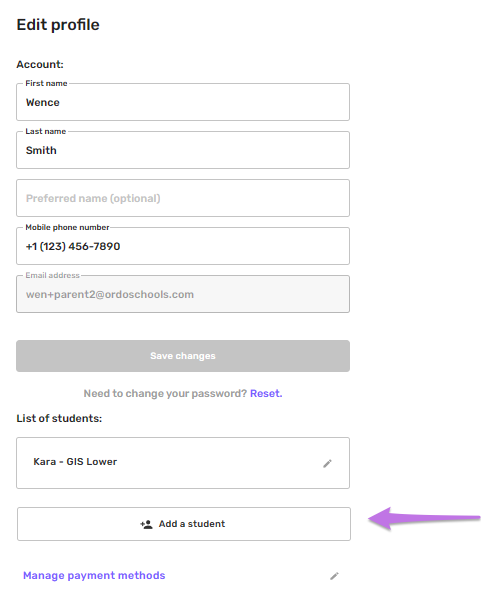
2. On the “Edit Profile” page, scroll down and click “Add a student” to add your second child from a different campus.
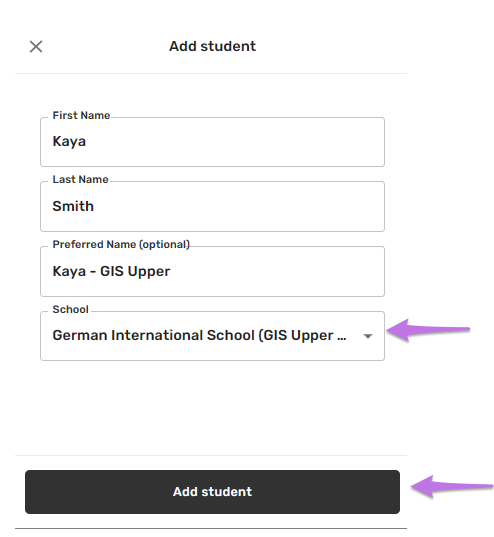
3. Enter the student’s information and select the campus of your second child. Once done, click "Add Student".
4. If you need to make changes on any of the student’s information, go back to the “Edit Profile” page and scroll down to the list of students. Click the pencil icon next to the student’s profile you’d like to edit.
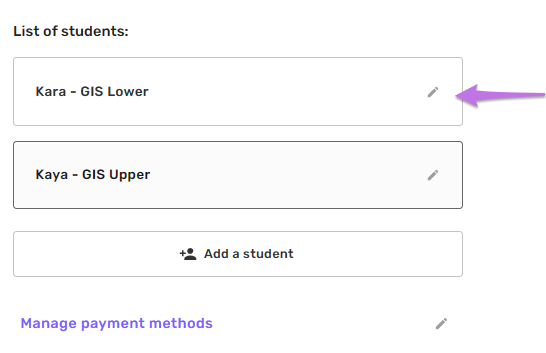
4. Make the necessary changes and click “Save Student” to apply the changes made.

If you encounter any issues or need any assistance while setting up your account or ordering an item, please don’t hesitate to reach out to our Support Team. We’d be happy to help!